|
Before you begin, make sure you have:
- A 19 mm (3/4 in.) U-bolt or wire rope (similar to National
Manufacturing No. 3230, STK No. 176-735)
- A security cable
- A lock, such as a combination lock or padlock
- Read Electrical Safety and Handling Static-Sensitive Devices
- Removed the server covers (see Preparing for the Installation)
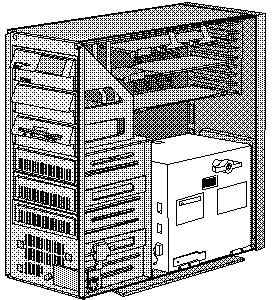
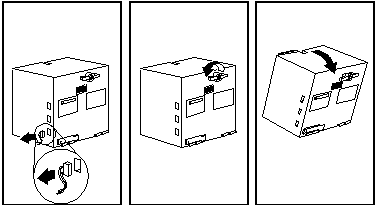
1. Tilt out the power supply:
Caution! When you
tilt out the power supply, do not let it drop. Personal injury or
damage to the system may result.
a. Disconnect the twisted power cables
from the power supply.
b. Unscrew spring-loaded power supply
retaining knob until it releases.
c. Place one hand on top of the server
for support.
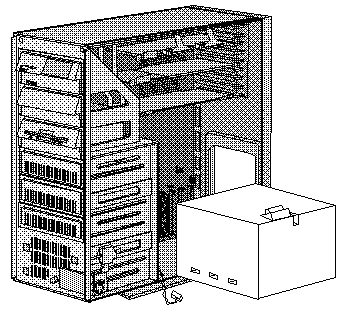
d. Tilt out the power supply with the
other hand. (Be sure power cord is removed from back of server before you
try to tilt out the power supply.)


2. Install the U-bolt:
a. Use screwdriver to remove the two
plastic inserts from U-bolt opening in rear panel.
b. Insert U-bolt through the holes and
secure it in place with the nuts.


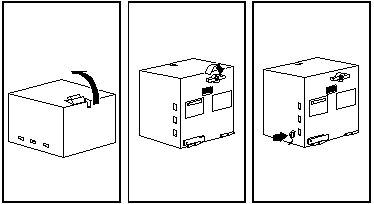
3. Reinstall the power supply:
a. Move the cables out of the way.
b. Tilt the power supply into the server.
c. Press in the retaining knob and turn
it to the right until it is tight.
d. Reconnect the twisted power cables
to the power supply.


4. Replace server covers and attach cables (see Opening
the Case).
5. Insert the security cable through the U-bolt. Loop the cable
around (or through) an object from which it cannot be removed; then, fasten
the cable ends together with the lock.

|