|
The go-to place for all IBM PS/2 and Micro Channel enthusiasts
|
|
|
PowerStacker 5x86 BIOS Configurations
|
|
You
may need to change some of the BIOS setup options
if the PowerStacker is not operating properly.
In most cases, you can access the BIOS setup options
by holding the "Delete" key during the POST
(Power On Self-Test). Refer to your computer manual
for further details.
 |
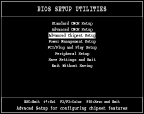
Advanced
Chip set Options:
Step 1
- Locate the "AT Bus Clock Selection"
(may be called AT Bus Clock Source). The settings
should be as follows:
- CLK/3
for a original machine SX/DX 16, 20, 25 or
SX2/DX2 50
- CLK/4
for a original machine SX/DX 33 or SX2/DX2
66
Step
2 - Locate the Memory Read Wait State (or
DRAM Wait State). You should have options of
two or three different settings for the Wait
State (or W/S). Experiment with the different
settings other than the default to find one
that works for your system.
Step
3 - Locate the Cache Wait State. If
your bus speed is higher than 33 MHz, the Wait
State should be set to 1. Otherwise, set
the W/S to 0.
Step
4 - Locate the System Boot-up Speed Setting.
High is recommended, but if you have recurring
boot problems, you may want to change the System
Boot-up Speed to Low.
|
 |
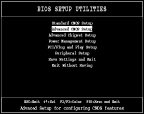
Advanced
CMOS Setup Options:
Step 1- Locate the Internal Cache settings
in the Advanced CMOS Setup. This setting
should be enabled. Some CMOS setups have
two Internal Cache settings, so be sure that
both are enabled.
Step
2 - Locate the "Numeric Processor Test"
setting in the Advanced CMOS Setup.
This
setting should be enabled. If it is disabled,
the floating-point unit is not recognized and
will significantly decrease the overall system
performance.
|
|
|
|
|